Samplers are powerful tools to play and manipulate short audio fragments. Whether it is a drum sample, chord, or vocal fragment. All kinds of audio can be tweaked to fit perfectly into your mix. Now that you know a thing or two about synthesis, using a sampler is not that much different.
A sampler also has ADSR envelopes, filters, modulation sources and destinations, and effects. A sampler is basically a synthesizer but with audio snippets as input instead of oscillators. Most samplers automatically map the sample across your entire keyboard allowing you to play it chromatically like any other instrument.
Sample Start and End points

end position in Ableton’s Sampler.
All samplers have an option to change the sample start position. Use this to remove any unwanted space before the sample. The endpoint defines until what point the sampler plays back a sound. This makes it easy to box in a sound with clear in and out points.
After you’ve set the playback range, you can change the ADSR settings to shape the sound further. Change the attack and release times to prevent clicks and pops. Turn down the sustain on drum samples and then use the decay time to change the length of the drum sound.

Decay Time
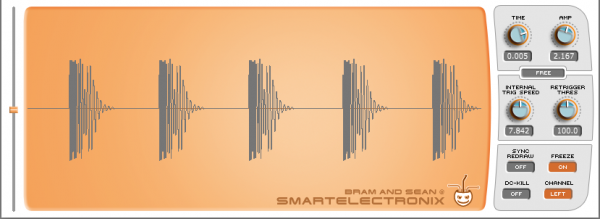
The decay time is especially important on kick drums. Try to set it so that the sound of one kick drum doesn’t overlap with the next. A shorter decay setting will give more punch to a kick drum. But if you set the decay time too short you will lose low-end. So spend some time tweaking this parameter. It might be useful to use an oscilloscope such as the free S(m)exoscope. This makes it easier to see the decay time of your samples in real-time.
Trigger Options
Samples can be configured in two ways. One-shot mode or looping mode. One-shot means that with every keypress a sample will play only once. In one-shot mode, a sample will always play from beginning to end once whether you hold a key down or not.
In Looping mode, a sampler can be configured to sustain a sample. Loop mode usually gives you the option to set additional loop-start and loop-end points so you can sustain only the tail-part of a sample. Crossfades can be set to create a smooth transition between loop points.

Timestretching
Traditional samplers worked in a similar fashion to a turntable or tape machine. If you wanted to change the pitch of a sample, the only option you had was to change the playback speed. A slower speed would lower the pitch of the sample and a higher speed would increase the pitch.
Nowadays, thanks to digital interpolation technologies we can change the pitch without affecting the tempo. Both methods sound different and each method has its benefits. Some samplers even have different time-stretching algorithms with varying results. Some will work great on drums and others will work better on sustained sounds. This is a matter of trial and error, see what works best for the sound you’re after.

Voices
Just like a synthesizer uses voices, a sampler provides you with multiple voices as well so you can play multiple notes at once. Some samplers also provide a unison mode.
Modulation
The fun part about samplers is that you can modulate parameters such as pitch, sample start, filter cutoff, and the likes with envelopes and LFO’s. These are powerful features that will deliver you lots of fun and creative options.

Effects
Not all samplers come equipped with effects but most samplers do at least have some sort of distortion, bit crushing, or drive effect. These effects emulate older digital samplers that were far from clean like the samplers from Ensoniq or Akai.

A sampler like Native Instruments’ Battery is focussed on drums and features many effects like transient shapers, compression, eq, tape saturation, and delay and reverb. Perfect effects to process drum samples.

